
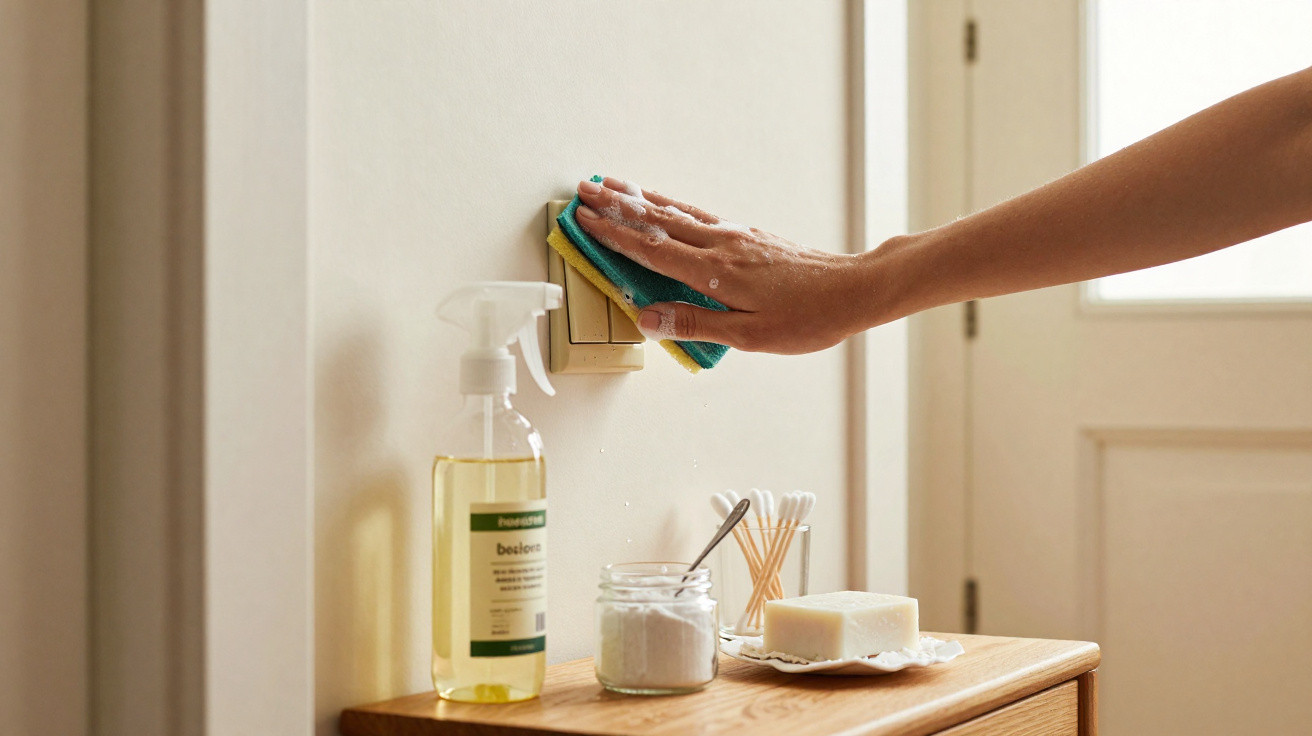
You press them dozens of times each day, yet hardly ever clean them: light switches are among the biggest germ traps in the home.
When cleaning their home, people often wipe the floors, bathroom and kitchen, while overlooking the very surfaces everyone touches constantly. Light switches can soon become greasy, turn yellow over time and may even harbour large numbers of bacteria. A few simple household remedies can refresh them within minutes, without costly specialist cleaners.
Safety first: avoid dangerous mistakes
Before you start cleaning, one step always comes first: switch off the power. There can be no compromises when damp cloths and cleaning products are involved.
- Turn off the circuit breaker: At the consumer unit, switch off the relevant circuit, or the main breaker if necessary.
- Never use soaking-wet cloths: Only dampen the cloth lightly; it must not be dripping.
- Do not spray directly onto the switch: Always apply the product to a cloth first, never straight onto the plastic.
“A lightly damp cloth is completely sufficient. Liquid getting inside the switch can damage the mechanism and, in the worst case, become dangerous.”
For maximum safety, only test the switch again once everything is dry and the circuit breaker has been switched back on.
1. Clean light switches with household vinegar
Household vinegar – usually sold in supermarkets as clear vinegar with a higher acid content – both cuts through grease and promotes hygiene. It is especially suitable for fingerprints and light greasy films, particularly in the kitchen.
- Mix lukewarm water with a little vinegar in a small bowl.
- Dip a soft cotton cloth into it and wring it out thoroughly until it is only damp.
- Wipe the switch surface and surround carefully.
- Buff afterwards with a dry cloth.
If you like, add a few drops of lemon juice to the mixture. As well as leaving a fresh scent, it slightly improves grease removal.
2. Brighten yellowed light switches with bicarbonate of soda
Many older switches do not look dirty so much as yellowish, especially in smoking households or rooms with poor ventilation. This is where bicarbonate of soda comes into its own.
How to make a cleaning paste from bicarbonate of soda
- Put several teaspoons of bicarbonate of soda into a small dish.
- Add water a drop at a time until it forms a thick paste.
- Apply it to the plastic surface using a damp cloth or a soft old toothbrush.
- Rub gently rather than scrubbing, to prevent scratches.
- Leave it to work for a few minutes, then wipe it away with a damp cloth.
- Finally, dry the surface thoroughly with a dry cloth.
For more heavily yellowed surfaces, strengthen the paste with a little soft soap or traditional hard soap. This boosts its grease-cutting power without damaging the plastic.
3. Traditional soap instead of harsh chemicals
Hard soap is mainly associated with bathrooms and laundry, but it also works well on switches and other plastic surfaces. It removes everyday grime, light grease deposits and dusty streaks.
The method is straightforward:
- Dissolve a little soap in a bowl of warm water.
- Dip in a soft cloth and wring it out well.
- Carefully wipe the switch and its surround.
- Go over it with a lightly damp cloth free from soap.
- Rub the surface dry with care.
The advantage is that soap is gentle, pleasantly scented and generally does not affect either plastic or wall paint, making it ideal for regular use.
4. Household alcohol for thorough hygiene
If germs and bacteria are your main concern, use ordinary household alcohol at around 70 per cent. It creates an almost germ-free surface within seconds.
“Especially in families with children or in shared households, it is worth giving frequently used switches – such as those in the hallway or bathroom – a quick disinfecting wipe.”
Here is how to do it:
- Lightly dampen a soft cloth.
- Add a few drops of alcohol, or dilute it with a little water if the bottle contains a 90-per-cent solution.
- Wipe the switch surface thoroughly.
- Let it air-dry afterwards – alcohol evaporates quickly.
Anyone with sensitive hands should wear thin gloves. Alcohol remains flammable, so keep it away from naked flames.
5. Remove paint splashes from light switches
After decorating, drips and splashes of paint often remain on switch surrounds. If they are durable enamel paints or particular wall paints, a suitable solvent can help.
For stubborn paint residue:
- Buy a suitable solvent, for example one intended for synthetic resin or epoxy paints, from a specialist retailer.
- Mix it with a little household vinegar to make it milder.
- Put only a small amount on a cloth and dab solely at the paint marks, rather than treating the entire switch.
- Leave it to work for around 20 to 30 minutes.
- Wipe over with a lightly damp cloth.
Test it on an inconspicuous area beforehand to ensure the plastic does not become dull. Many modern switch plates are more sensitive than they appear.
6. Reach every crevice with cotton buds
Much of the dirt sits not on the surface itself, but in the narrow grooves around the rocker switch. A cloth can barely reach these areas, so cotton buds are the right tool for the job.
For detailed cleaning:
- Moisten a cotton bud with a little vinegar water, soap solution or alcohol.
- Run it through the gaps around the switch button.
- Work carefully over corners, fine grooves and the transitions to the surround.
- Throw away dirty buds and use fresh ones – it is better to use more than one.
This step alone can dramatically improve the appearance of a switch, as the dark dirt in the gaps disappears.
7. Removable switch covers: soak them in the basin
Many modern switches can be partly dismantled: the actual insert stays in the wall, while the surround and rocker can be unclipped. If you are unsure, check the manufacturer’s instructions or search online for the model designation.
Where the covers can be removed, clean them as you would other plastic items:
- Switch off the circuit breaker, then carefully remove the surround and rocker.
- Place them in a basin of hot water with a little mild washing-up liquid or soap.
- Leave them to soak for several hours.
- Wipe them with a soft sponge or cloth.
- Rinse with clean water and dry thoroughly.
- Put them back onto the dry switch and clip them into place.
Afterwards, many old switches look almost newly fitted – an effect that is particularly noticeable in hallways and kitchens.
How often should you actually clean light switches?
A set routine helps ensure the task is not forgotten again. Switches do not need polishing every day, but they should be part of your normal cleaning schedule.
| Area | Recommended cleaning |
|---|---|
| Bathroom and downstairs toilet | Wipe with a damp cloth once a week |
| Kitchen | Every 1–2 weeks; more often if you cook frequently |
| Hallway and living room | Every 3–4 weeks |
| Children’s bedroom | Briefly disinfect weekly with alcohol or vinegar water |
If you already clean door handles or smartphone surfaces, simply include the switches in the same round. That way, they never get grimy in the first place.
Why light switches become germy so quickly – and what it means
Light switches are typical high-touch surfaces in the home: everyone handles them, often straight after coming indoors, cooking or using the toilet. As a result, germs build up even when they are barely visible to the naked eye.
For healthy people, this is usually not a major problem, but regular wiping with vinegar water or alcohol reduces the risk of stomach bugs or cold viruses. This small routine is particularly worthwhile in homes with lots of people or frequent visitors.
Practical combinations for everyday use
In everyday life, simple combined approaches have proved effective:
- Quick clean between times: A damp cloth with a little vinegar, ideal after cooking.
- Monthly deep clean: Bicarbonate of soda paste for yellowed switches, followed by a wipe with alcohol.
- Decorating check: Remove paint splashes after every paint job before they harden completely.
Making these few actions a habit takes very little effort and makes a flat or house look far more well cared for. Clean light switches are rarely noticed consciously – dirty ones stand out all the more.



Comments
No comments yet. Be the first to comment!
Leave a Comment