
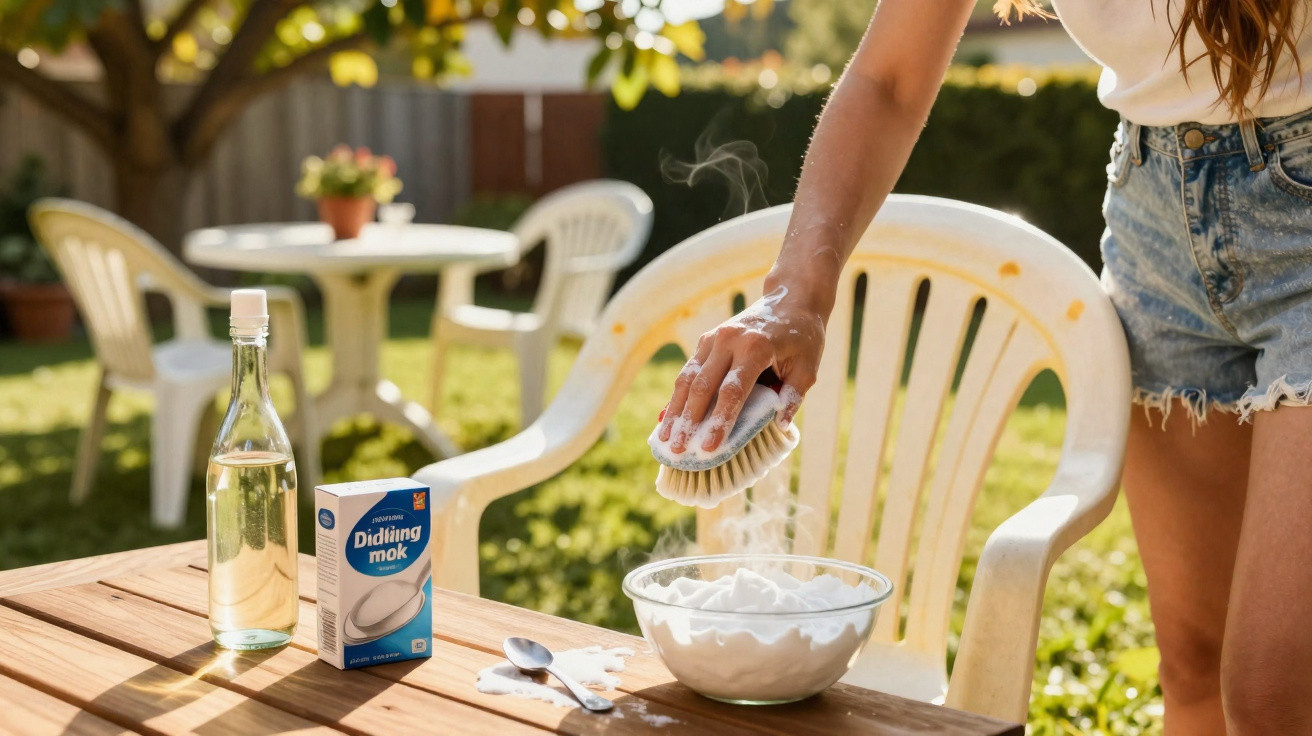
After winter, many plastic garden chairs look past their best – grey, stained and yellowed.
Yet a simple household remedy from the kitchen cupboard can make that initial shock seem far less severe.
When it is time to prepare the garden in spring, the result often comes as a surprise. Plastic furniture that was once bright white or vividly coloured can look dull, weathered and suddenly very old. Rather than reluctantly taking it to the tip, check your kitchen cupboard first. A cleaning solution made from a few everyday products can restore most plastic garden furniture remarkably well.
Why plastic garden furniture quickly becomes unsightly
Plastic is considered hard-wearing: it does not rust or rot, and it does not need refinishing. In reality, however, it is still affected by the weather. Sunlight, rain and fluctuating temperatures all damage its surface, resulting in discolouration, lost sheen and small cracks.
UV radiation is particularly significant. It fades plastic and makes the outer layer slightly porous. These tiny pores then trap everything that blows around outdoors: dust, pollen, soot, algae spores and mould spores. White furniture develops yellow and grey films, while coloured pieces can look faded and grubby.
In practical terms, the condition of the furniture can be divided broadly into two categories:
- Simply dirty: The surface is dull, stained or greenish but still feels smooth. Thorough cleaning is almost always enough in this case.
- Already breaking down: The plastic appears chalky, rubs away when touched or has cracks. The material is then damaged and can only be disguised, rather than genuinely restored.
Before trying any cleaning method, carry out a quick safety check. A chair back that is already split or a leg that is cracked can break under weight. For safety reasons, such items really do belong in the bin, not merely “at the back of the garden”.
The simple kitchen mixture that brightens yellowed furniture
For the large number of pieces that are merely dull or yellowed, a surprisingly straightforward mixture is enough. Everything is usually already available at home, with no need to buy anything extra:
- warm water
- ordinary household white vinegar
- bicarbonate of soda or washing soda
- soap, such as black soap, household soap or a little washing-up liquid
- optional: a clay-based cleaning stone for heavily soiled white surfaces
For a bucket containing around 3 litres of water, the following combination has proved effective in practice:
| Ingredient | Quantity for around 3 litres |
|---|---|
| Warm water | enough to fill the bucket well |
| White vinegar | around 250 millilitres |
| Bicarbonate of soda / washing soda | 3 tablespoons; slightly more for heavy yellowing |
| Soap / washing-up liquid | a generous squirt or small splash |
“The combination of soap, vinegar and bicarbonate of soda removes grease, dirt and grey film at the same time – without an aggressive chemical mix from a spray bottle.”
How to use the mixture correctly
For a good result, a systematic approach matters more than force. These steps work well:
- Remove loose debris: Wipe away cobwebs, leaves and loose dust with a hand brush or dry cloth.
- Prepare the solution: Put the warm water into the bucket first, followed by the vinegar and soap. Add the bicarbonate of soda last. The mixture will foam slightly, which is normal.
- Coat the surfaces: Apply it generously with a soft sponge or cloth. Clean every side, including undersides and chair backs.
- Leave it to work: For obvious stains and grey film, allow the mixture to remain on the surface for 10 to 15 minutes.
- Scrub gently: Use the soft side of the sponge or a soft brush. Do not use an abrasive sponge or steel wool.
- Rinse thoroughly: Rinse with a garden hose or watering can until no foam remains visible.
- Dry: Wipe over with a microfibre cloth to prevent water marks.
For heavily yellowed white furniture, it can help to increase the proportion of bicarbonate of soda slightly or treat individual areas with a little washing soda. Always test first on an inconspicuous spot.
Special considerations for coloured furniture
On coloured plastic, bicarbonate of soda has a strong degreasing effect. In extreme cases, this can make the colour pigments appear duller. A gentler mixture is often sufficient here:
- use more warm water and slightly less bicarbonate of soda
- focus on soap and vinegar
- reduce the contact time, but clean twice if necessary
This leaves the colour looking fresher rather than washed out.
What permanently damages plastic – and what works better
There are plenty of well-intentioned tips for garden furniture that cause more harm than good over time. It is best to avoid a few common methods:
- Chlorine bleach: Cleaners containing chlorine or strong bleach attack the plastic, make it brittle and can even intensify staining unevenly.
- Strong solvents: Aggressive bathroom or limescale cleaners often leave behind dull, rough patches.
- Metal or hard sponges: Abrasive pads with a rough side, steel wool and wire brushes scratch the surface. Dirt then settles in these grooves even more quickly.
- Pressure washers at full power: The forceful jet can strip away material, especially from older chairs.
- Cooking oil as a “shine product”: It may make everything look glossy briefly, but dust then sticks to it. The surface becomes more vulnerable instead.
“The smoother and more intact the plastic surface remains, the easier it is to clean – every scratch works against you.”
Keeping garden furniture looking good all summer
Anyone who does not want to face a “grey-on-grey shock” every spring should establish a simple care routine. It does not need to take much effort.
Quick care during the season
During the months when tables and chairs are used every day, a quick clean every two weeks is enough:
- wipe seats and armrests with a damp cloth and a little soapy water
- remove marks from sun cream, bird droppings or blossom dust as soon as possible
- do not forget frames and table legs, as dirt collects there too
This small amount of work prevents a thick film from developing that is difficult to remove.
The important autumn clean
Before the weather turns wet and cold, it is worth carrying out a thorough clean:
- wash the furniture with the vinegar and bicarbonate of soda mixture
- then allow it to dry completely, including inside hollow sections
- stack chairs and cover them with a breathable protective cover, or store them in a shed, garage or dry basement
This protects the furniture not only from moisture but also from severe frost, which can fatigue the material.
Sun protection matters for plastic too
Many people place plastic furniture in full sun and assume this causes no problems. In fact, it ages more quickly there. As with painted car surfaces or metal garden furniture, every bit of shade helps.
Ideal options include:
- a spot beneath a parasol or awning
- a covered area on the patio
- a lightweight cover placed over the table during the day when it is not in use
This significantly reduces direct UV exposure. Colours remain richer for longer, while white plastic yellows less quickly.
When repainting or replacement is worthwhile
Some pieces of furniture look surprisingly good after cleaning but still feel slightly rough. In this situation, specialist paint for plastic can be an option. It disguises discolouration and makes the surface look smoother. Beforehand, all cracks and breaks must be checked for stability.
If the plastic is already soft, brittle or visibly rubs away during cleaning, paint will not save it either. The aim is then to make a sensible decision: perhaps use old chairs as side tables or plant stands on the balcony, and invest in new, sturdier furniture for everyday use.
When buying new furniture, ideally choose durable materials with UV protection and good workmanship. It is often worth spending a little more if the furniture lasts longer and, with the care described above, withstands many summers.
One final point is often underestimated: cleaning-product residue. If soap remains on the surfaces, it attracts dirt like a magnet. The furniture will then quickly look stained again. For that reason, always finish by rinsing thoroughly with clean water, even if it means using one more bucket.
Comments
No comments yet. Be the first to comment!
Leave a Comment