
Many homes face the same strange mismatch: they buy more laundry products and increasingly pleasant fragrances, yet their washing machine smells like a blocked drain. In many cases, the cause is sitting in full view beneath the door of a front-loading machine.
The hidden corner that breeds grime, mould and bad smells
It is easy to think of the drum as a self-cleaning chamber, continually washed with hot water and detergent. In practice, that is not quite true. The rubber door seal is among the machine's grimiest areas, despite being one of the parts people inspect least often.
This pliable ring around the drum opening prevents water from flooding onto the kitchen floor. However, its folds create an ideal hiding place for the material the machine is meant to remove. Within a few weeks, a sticky mixture can collect there: partly dissolved washing powder, heavy fabric softener, soap residue and fibres shed from clothing.
Hair, pet fur and the occasional forgotten tissue add to the problem, creating a grey sludge that gathers at the lowest point of the seal. You will rarely notice it unless you carefully pull the rubber back and inspect its inner folds.
That rubber ring is not just a seal; it’s a reservoir where moisture, detergent and organic debris quietly accumulate.
Once this debris has built up, the conditions inside the appliance encourage it further. The drum remains warm and moist after a cycle, particularly during winter, when windows are closed and bathrooms have limited ventilation. Dampness stays on the rubber, while the accumulated grime provides a food source.
These are precisely the conditions required by bacteria and microscopic fungi. Eventually, tiny black or dark marks develop on the seal: these are mould colonies. They give off musty or sour-smelling gases that can later cling to your laundry.
This explains why clothes may leave the machine with unexpected marks or a slight damp-cellar odour, even if you use lots of fragranced detergent. Water travels through this contaminated area during every wash.
If mould takes hold in the seal, it can damage the rubber, threaten the watertight barrier and send odours through the entire machine.
Why bleach is tempting – and why it’s a bad idea
When faced with blackened rubber, many people immediately turn to bleach. It seems like the ultimate solution: strong, inexpensive and reassuringly effective. However, manufacturers generally advise against using it on this particular component.
Bleach is corrosive, and frequent use may leave the rubber porous and brittle, causing minute cracks to form. As well as increasing the risk of leaks, those cracks create additional gaps in which dirt and microbes can collect.
Bleach may also cover up odours rather than remove their underlying cause. If sludge remains trapped beneath the seal, the smell will return once the chemical's effects wear off.
The under-£1 “weapon” that cleans the seal without damage
A milder alternative is increasingly preferred by technicians and careful householders: ordinary white vinegar. It is inexpensive, easy to find and much less harsh on rubber than bleach.
White vinegar’s mild acidity breaks down limescale and soap scum, helping to lift mould and residue from the rubber folds.
What you need for a deep clean
- A clean microfibre cloth or an old cotton towel
- Household white vinegar, containing roughly 5–8% acetic acid; in some countries, it is marked as 12–14°
- An old toothbrush for awkward corners
- Optional disposable gloves if the seal is particularly dirty
Step-by-step: reclaiming your rubber seal
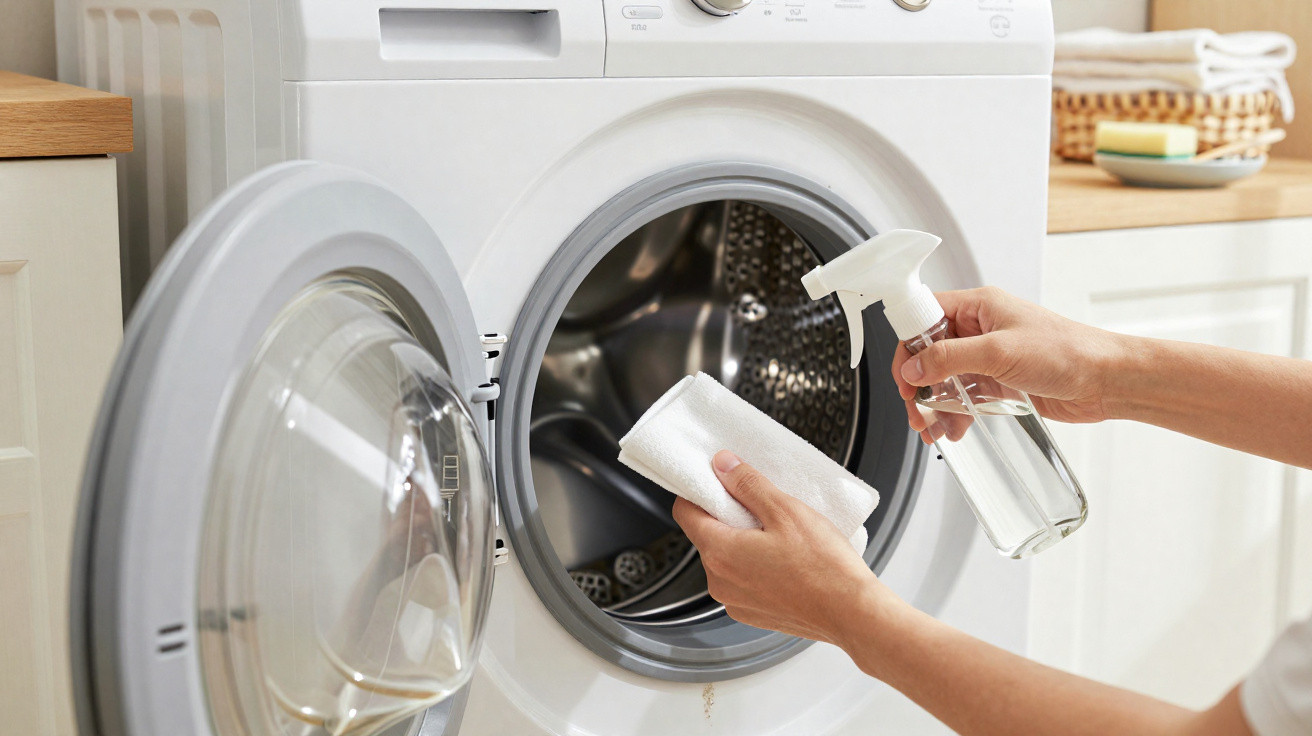
First, switch the appliance off and open its door completely. Use one hand to gently draw back the rubber seal, revealing the groove behind it. The amount of dirt inside often surprises people the first time they check.
Saturate the cloth with white vinegar so that it is properly wet rather than simply damp. Begin by cleaning the seal's exposed surface, then press the cloth into the groove to reach the sludge at its base. Move gradually around the full circle, rinsing and soaking the cloth again whenever it becomes grey.
For persistent black marks, hold the vinegar-soaked cloth against the affected spot for five to ten minutes. The acid requires time to soften limescale and release fungal growth. Afterwards, scrub using short, firm toothbrush strokes.
Continue as necessary until the rubber feels smooth and the most noticeable staining has been removed. It may not regain a brand-new appearance, but most of the active mould and residue should be cleared away.
A monthly vinegar wipe can keep the seal flexible, limit limescale and stop grime turning into a permanent crust.
Two daily habits that stop mould before it starts
A proper deep clean can have a major effect, but lasting improvement comes from small actions after every wash. They take only seconds and interrupt the dampness-and-decay cycle.
Reflex 1: dry the seal after every cycle
Once the programme has finished and the drum is empty, use an ordinary towel or dishcloth to wipe around the rubber seal once, gently working into its fold. The aim is to remove visible water droplets and loose debris before they can settle.
This quick action gets rid of the standing water that mould favours. It also picks up hair and lint, leaving less material to decay between washes and reducing the effort required during the monthly deep clean.
Reflex 2: let the machine breathe
After removing the final sock, try not to shut the door immediately. Closing it completely traps humid air and detergent traces inside an enclosed space, which is exactly the environment microbes prefer.
Leaving the door slightly open between washes allows air to circulate, helping the drum and seal dry naturally.
Even a narrow opening can help. Within several hours, the machine's internal surfaces cool down and dry out, so odours lessen rather than grow stronger. Many users say this habit alone almost entirely eliminates the “wet dog” smell from the laundry room.
How this grime affects more than just smell
A soiled seal causes problems beyond unpleasant odours. Residue may transfer to fabrics, particularly pale garments and sportswear. This is one reason freshly washed laundry can sometimes come out with grey lines or small dark marks around its edges.
Build-up may also interfere with the machine's operation. A dirty seal often occurs alongside a blocked detergent drawer or filter, making rinsing less effective. Clothes can feel less soft, while sensitive skin may react to surfactants and fragrance residues left in the fibres.
| Problem noticed | Likely link with the door seal |
|---|---|
| Musty smell on clean clothes | Mould and bacteria living in damp rubber folds |
| Grey streaks on light laundry | Dirty sludge releasing during the spin cycle |
| Visible black spots on the seal | Established mould colonies feeding on residue |
| Occasional small leaks at the door | Rubber losing flexibility or blocked by debris |
Cold washes, eco cycles and why they change the game
Modern laundry habits can unintentionally worsen seal issues. To reduce energy use, many households now choose low-temperature and eco cycles. While this is good for household bills, it is less beneficial for the appliance's internal hygiene.
At lower temperatures, detergents, especially powders, do not always dissolve fully. The remaining product can then adhere to the rubber. Mould also flourishes when temperatures seldom rise above 40°C. Without an occasional hot wash, the machine's internal parts never receive a proper heat treatment.
A straightforward approach is to run an empty 60°C or 90°C cycle once a month, adding a cup of white vinegar to the drum. This can help rinse through the pipes, drum and rear of the seal. It is not a substitute for manual cleaning, but it complements it.
When the seal might need replacing
In some cases, deterioration has already become severe. Replacing the seal is the safer choice if the rubber has deep splits, remains misshapen or still smells strongly after cleaning.
A degraded seal can leak gradually, leaving concealed pools beneath the machine and potentially causing water damage to neighbours in flats. On many models, a capable DIYer can replace the seal using basic tools, although older and integrated machines may prove more difficult. Either way, a replacement seal will usually cost considerably less than a new appliance.
Key terms and real-life scenarios
Two terms are common on detergent packaging but are rarely explained: “surfactants” and “softeners”. Surfactants are the cleaning ingredients that separate dirt from fabric. If they are not thoroughly rinsed away, they adhere to clothing as well as the machine's internal surfaces. Fabric softeners, by contrast, are oily substances that coat fibres. They can also coat rubber seals, making a sticky layer on which lint and mould can build up.
Consider a busy household with daily loads of school uniform, sports kit and pet bedding. Most items are washed cold, with plenty of softener added to keep them “fresh”. The door is kept shut because it makes the room look tidier. After a month, the seal can become a damp band of detergent paste, hair and fluff. Smells begin to develop. A few weeks afterwards, somebody notices streaks on white shirts and mild itching after wearing them. This sequence is common, but entirely preventable once you know where to inspect and what to do.
Combining affordable products such as white vinegar with small everyday habits can stop this poorly designed but unavoidable rubber fold becoming a health and hygiene concern. The washing machine can then return to its intended purpose: genuinely cleaning clothes rather than quietly spreading hidden grime.



Comments
No comments yet. Be the first to comment!
Leave a Comment